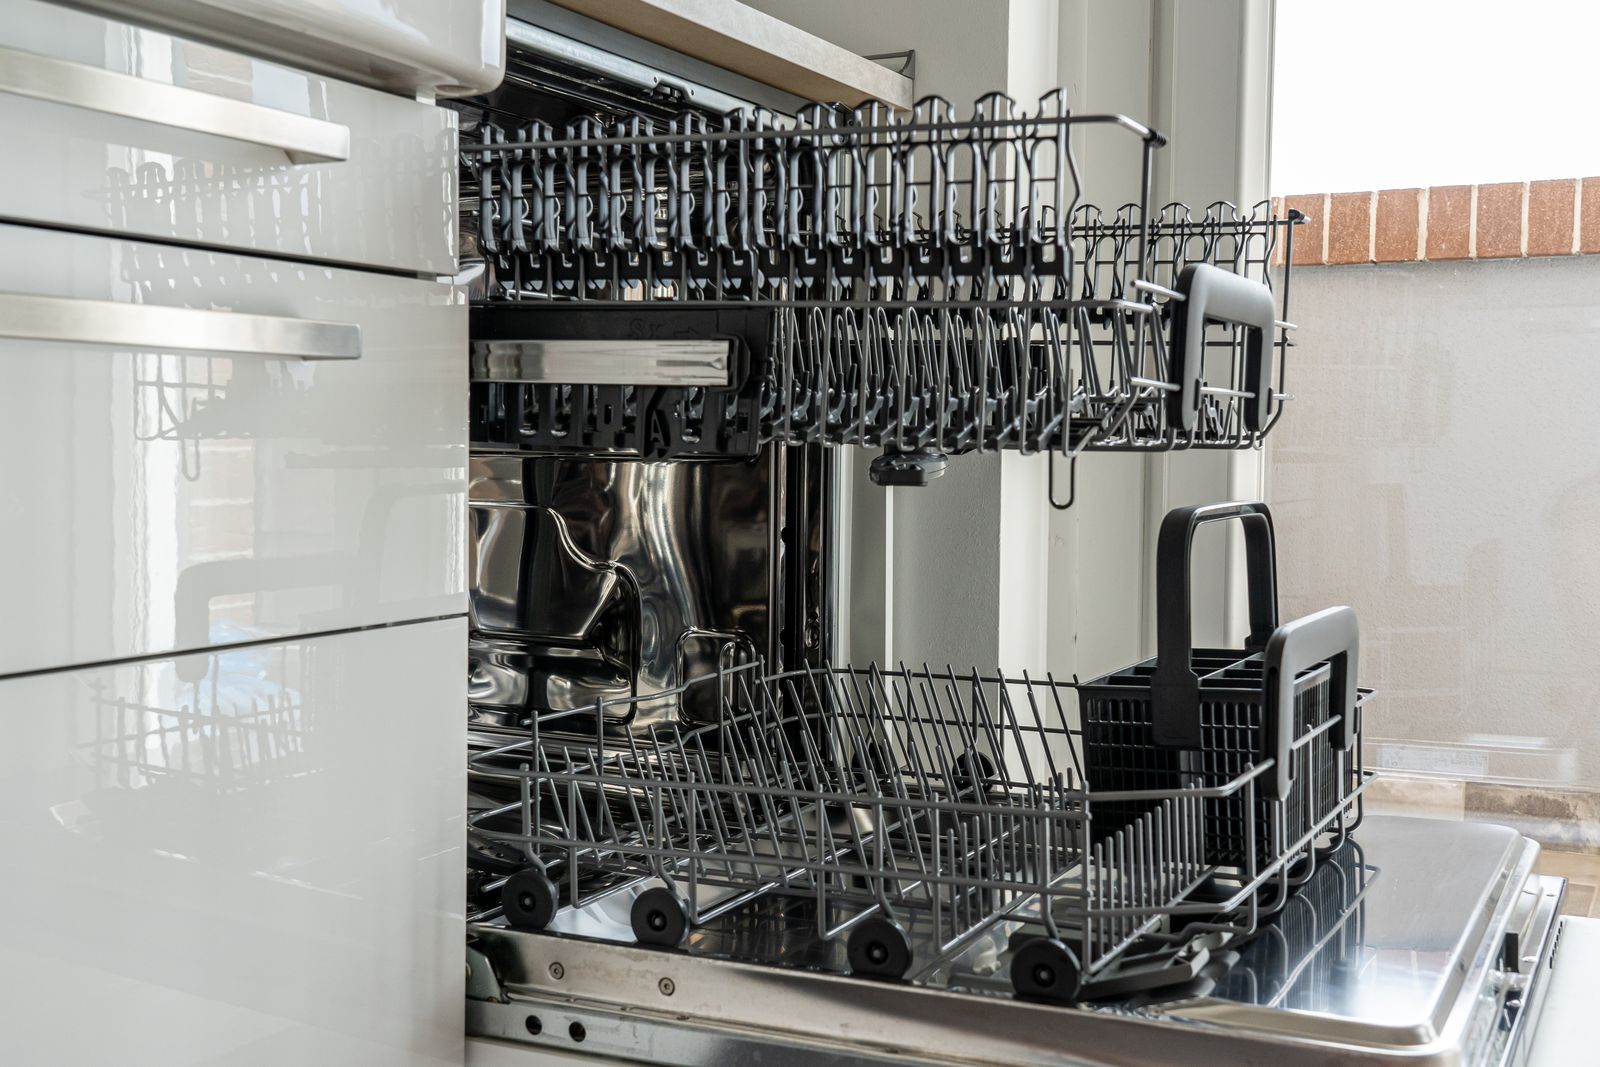
Category: Deep Cleaning

  • How to Clean a Dishwasher That Smells

    How to Clean a Dishwasher That Smells

    A dishwasher that smells is not dirty in a general way — it is holding food in one of five specific places, and you can usually find which one in under ten minutes. In order of likelihood: the filter assembly in the floor of the tub, the spray arm jets, the rim and gasket around the door, the sump under the filter, and the drain line. Almost everything written about this problem tells you to run a cycle with a cup of vinegar on the top rack. That will deodorise the air inside the machine for a day or two and remove none of the food.

    The procedure below clears all five, in the order that stops you doing the same work twice — you take the filter out first so that everything you dislodge afterwards has somewhere to fall, and you run the cleaning cycle last so it flushes the lot. Budget about 40 minutes of hands-on work plus one long empty cycle. Two of the steps involve chemicals that can permanently damage a stainless steel tub or perish the door seal, so read the warnings where they appear rather than skipping ahead.

    Why dishwashers smell: the five causes, ranked

    • A clogged filter. On any dishwasher made in roughly the last fifteen years, food scraped off your plates ends up in a removable filter in the floor of the tub. It is designed to be emptied by you. If nobody has ever emptied it, that is your smell and nothing else you do will fix it.
    • Blocked spray arm jets. Seeds, rice grains, bits of label and hard water scale plug the small holes. That both wrecks cleaning performance and leaves food sitting inside the arm itself.
    • The door edge and gasket. The strip of tub below the door, and the rubber seal around it, sit outside the wash path. Water and food get there; the spray never does.
    • A drain fault. If there is standing water in the sump after a finished cycle, the machine is not draining, and no amount of cleaning will help until that is fixed. This is the cause that gets misdiagnosed most often.
    • Not running it enough. A dishwasher used once a week sits damp with a few days of food in it between runs. That is a mildew smell rather than a rotting one — different smell, different fix.

    First, find out whether your dishwasher has a filter you clean

    Open the door, pull the bottom rack out, and look at the floor of the tub, usually beneath or just behind the lower spray arm. You will see one of two things.

    A manual filter (most dishwashers today)

    Typically two parts: a cylindrical fine filter that twists out counter-clockwise, sitting inside a flat coarse filter or mesh plate that then lifts free. On Miele machines there is a third element — a micro filter that pulls downward off the assembly by its plastic ring, and which is the part people leave dirty because they never realise it separates. Manufacturer intervals range from “after every use” to “every few months”; the brand-by-brand figures are further down this page.

    A hard food disposer (older machines and some current US models)

    A fixed grinder assembly with no part that twists out. These are self-cleaning by design. If nothing rotates or lifts with light hand pressure, stop — do not lever it. Check your model number in the manual before touching it. Forcing a fixed filter assembly is how people crack the sump housing, and a cracked sump leaks under the cabinet where you won’t see it for weeks.

    What you need before you start

    • Washing-up gloves — non-negotiable, see the warning below
    • An old toothbrush and, ideally, a narrow detail brush
    • Wooden toothpicks for the spray jets — not a paper clip, not wire, for the reason set out in the spray-arm section
    • Two microfibre cloths
    • A bowl of hot water with washing-up liquid in it
    • A dishwasher cleaner or descaler approved for your machine — not a general-purpose bathroom product

    The brushes are what make this quick. A worn toothbrush will not reach into a spray arm or along a gasket channel, and you end up doing three passes where one would have done. If you want the small stiff detail brushes that make this kind of job fast, they’re in what a professional cleaning caddy actually holds — it’s the same handful of tools for the dishwasher, the oven and the shower door.

    Wear gloves and do not sweep the sump with bare fingers. The filter housing and the sump beneath it collect glass chips from broken glasses, snapped skewers, staples and the sharp edges of foil. This is the single most common way people injure themselves cleaning a dishwasher. Also, if the machine has just run, let it stand twenty minutes — the tub and the water in the sump come out hot enough to scald.

    The full procedure

    About 40 minutes of hands-on work, then a cleaning cycle that will run somewhere between 1.5 and 2.5 hours on most machines. Do it in this order.

    1. Empty the machine completely and pull out both racks (2 minutes). The lower rack usually rolls right off its rails. Working with the racks in place is why this job takes people an hour.
    2. Remove the filter assembly (3 minutes). Twist the cylindrical filter counter-clockwise and lift it out, then lift out the flat coarse filter underneath. Take a photo on your phone first if you are unsure how they seat together — refitting them wrongly lets food straight into the pump.
    3. Soak and scrub the filters (10 minutes, mostly unattended). Drop them in the bowl of hot soapy water. Leave them while you do the next steps, then brush both sides of the mesh under running water. Hold the fine filter up to a light — if you can’t see light through the mesh, keep going. Do not use a wire brush or an abrasive pad; scoring the mesh makes it clog faster.
    4. Clear the sump and the pump inlet (5 minutes). With the filters out you can see down into the sump. Gloved, lift out anything solid. Wipe the surrounding floor of the tub with a cloth. If there is standing water down there that will not drain, stop and read the drain section below — cleaning will not fix it.
    5. Do the spray arms (10–15 minutes). Full method in the next section. Do this with the filters still out so the debris drops where you can retrieve it.
    6. Clean the door edge, the gasket and the detergent dispenser (8 minutes). Pull the door fully down and wipe the strip of tub below the door opening — the part that stays dry during a cycle. Run a damp cloth around the rubber gasket, then go along it again with the detail brush in the channel where it meets the tub. Open the detergent dispenser flap and brush out the caked residue in its corners.
    7. Refit the filters, then the racks (3 minutes). The coarse filter goes back first, then the cylindrical filter twists clockwise until it locks. Give it a gentle tug — a filter that is not locked will lift during the cycle and let food into the pump.
    8. Run an empty cleaning cycle (1.5–2.5 hours, unattended). Nothing in the machine but the cleaner. Use the hottest cycle available, plus a Sanitise option if your machine has one. If your dishwasher has a dedicated Machine Care, Tub Clean or Self Clean cycle, use that instead.
    9. Prop the door open afterwards (1 minute). Leave it on the latch overnight so the interior dries.

    How often the manufacturers actually say to do this

    “Clean it now and then” is the standard advice. The documentation is a great deal more precise than that, and the brands are not close to each other:

    • Miele builds the interval into the machine. Its dishwashers display Sieb kontrollieren — “check filter” — every 50 programme cycles as the factory setting, and the interval is user-adjustable in the settings menu between 30 and 60 cycles. That is a manufacturer telling you, in a number, that it expects the filter to need attention roughly every seven to eight weeks in a household running the machine daily.
    • Panasonic, on its Japanese built-in dishwashers, is far stricter: the residue filter (zansai firutā) comes out and is emptied and rinsed after each use, and Panasonic adds that if soil has built up around the heater cover it should be worked off with a toothbrush. Japanese machines are smaller and run more often, but the underlying logic holds everywhere — food that leaves the filter within a day never gets the chance to rot in it.
    • Bosch tells owners to clean the filter every few months as a baseline, with more frequent cleaning depending on use.

    Take the strictest one your patience can sustain. If you cook meat, rice or pasta regularly, the Panasonic position is not fussiness.

    Why the rubber seal is the part with the evidence behind it

    Of everything in a dishwasher, the door gasket is the surface with the most published work on it — and the results are the reason step 6 of the procedure exists. A 2011 study by Zalar and colleagues in Fungal Biology sampled dishwashers internationally and detected the black yeasts Exophiala dermatitidis and Exophiala phaeomuriformis in 35% of the machines examined. A later study published in PLOS ONE in 2016 found E. dermatitidis in 47% (14 of 30) of the dishwashers tested, and reported that the rubber seals were the most frequently fungus-contaminated part of the machine (57%, 17 of 30), carrying up to 106 colony-forming units per square centimetre.

    The operative detail for anyone holding a cloth is what those organisms tolerate. The 2016 paper describes them as surviving low and high pH, temperatures up to 60 °C or 80 °C, occasional drying out and high organic loading. That is a plain explanation of why running a hot cycle and hoping does not clear a dishwasher gasket: the conditions inside the machine are the conditions these organisms are adapted to. They come off mechanically — a brush and a cloth along the channel — or they do not come off. This is not a reason for alarm about your dishwasher; it is a reason to stop treating the seal as an optional extra at the end of the job.

    The spray arms: the step nearly everyone skips

    Most dishwashers have a lower spray arm, an upper arm under the top rack, and often a small third jet in the roof. Food in the jets does two things: it starves the top rack of water, so plates come out dirty and you assume the machine is failing, and it holds a pocket of rotting food inside the arm where nothing washes it out.

    1. Spin each arm by hand. It should turn freely with a light push. Resistance or a wobble means something is jammed under it or the bearing is worn.
    2. Check every jet. Work around the arm and clear each hole with a wooden toothpick — this is the tool Miele’s own instructions name. Push gently and pull the debris out rather than driving it further in.
    3. Take the arms off if your model allows it. Many lower arms lift straight off their spindle; many upper arms release with a plastic nut that turns counter-clockwise. Check the manual — some are not designed to come off, and forcing them cracks the mount.
    4. Flush a removed arm under the tap from the centre hole and let the water run out through the jets, then shake it out. You will often hear grit rattling inside.
    5. Refit and spin again to confirm free rotation before you close up.

    If your jets are furred rather than blocked with food, that is limescale, and it means a descaling cycle rather than a toothpick. Use a descaler approved by your machine’s manufacturer.

    The documented interval for the arms, and the tool the manuals name

    Spray arms have a published service interval too, and it is shorter than most people assume. Panasonic specifies that the spray nozzles on its built-in dishwashers are removed and rinsed under water monthly — not inspected, removed — along with a wipe of the door, the interior, the exhaust port and the tank edges with a well wrung-out soft cloth. Miele‘s user instructions tell owners to check the spray arms regularly for blockage by food residue or limescale and to clear the jets carefully with a toothpick or a small brush, then rinse under clear water. The toothpick is not a folk remedy; it is what the manual specifies, and the reason is that wood snaps before it does damage, whereas a straightened paper clip or a piece of wire is harder than the moulded plastic of the jet and will scrape it out of round.

    That matters more than it sounds. The jets are sized to produce a specific spray pattern and pressure. Widening one with a needle or a drill bit permanently changes where the water goes, and a machine that has had its jets “cleared” that way can wash worse afterwards than it did blocked. Push debris out, not in, and stop when the hole is clear rather than when it looks bigger.

    Two further notes from the documentation. Miele’s filter procedure has a step most people miss: the micro filter pulls downward off the filter combination by its plastic ring, separating into coarse, fine and micro elements that each need rinsing under running water with a washing-up brush — cleaning the assembly as one lump leaves the inner face untouched. And Panasonic’s guidance warns against pouring water or hot water directly into the cabinet and against letting water sit against the door seal, because prolonged wetting there causes staining and deformation of the packing. Wipe the seal; do not flood it.

    If it still smells, the problem is the drain, not the dishwasher

    A machine that has been properly cleaned and still smells of stagnant water is not draining fully, and this is a plumbing fault rather than a cleaning one. GE is explicit that dirty water sitting in the machine is an installation problem. Check these in order:

    • Standing water in the sump after a completed cycle. A small amount of residual moisture is normal; a visible pool is not.
    • The drain hose high loop. Installation instructions require the drain hose to rise to a high loop under the worktop, or to run through an air gap fitting on the sink deck, before it drops to the disposal or waste. Without one, dirty water siphons back from the sink drain into the dishwasher and sits there. Open the cabinet under the sink and look: the hose should climb, not run flat.
    • The air gap fitting, if you have that little chrome cylinder on the sink deck. They clog. The cap and cover lift off and the insert can be pulled and rinsed.
    • The garbage disposal knockout plug. If the dishwasher is newly installed, or the disposal was recently replaced, and the machine has never drained properly since, this is very likely it. Disposals ship with a plastic plug sealing the dishwasher inlet, and whoever fitted it has to knock that plug out. If it is still in place the dishwasher cannot drain at all.
    • Run the disposal before every dishwasher cycle. Food sitting in a shared disposal chamber smells, and the dishwasher gets blamed for it.

    Unplug the garbage disposal at the wall before reaching into it for any reason, including retrieving a knocked-out plug. Switching it off at the wall switch is not sufficient. If you are not confident working under the sink, this is a plumber’s job and a short one.

    The high loop has a number, and you can measure it in two minutes

    “Make sure the hose loops up” is where most articles stop. The installation documentation is specific, and it is the same figure across the Whirlpool group of brands — Whirlpool, KitchenAid, Maytag and JennAir all publish the same requirement:

    • The apex of the drain loop must sit at least 20 inches (50.8 cm) above the floor.
    • The drain hose must connect above the drain trap in the house plumbing, not below it.
    • If the loop cannot be got to 20 inches, an air gap fitting must be used instead.

    Below that height the machine can siphon: waste water from the sink drain is drawn back down the hose into the sump, where it sits between cycles. That is what a persistent stagnant smell in an otherwise clean dishwasher usually is. In practice the loop is normally fastened to the underside of the worktop, which on a standard 36-inch counter puts it comfortably above the minimum — so the failure cases are the installs where the hose was simply run flat along the cabinet floor to the disposal.

    Take a tape measure into the cupboard under the sink, find the highest point the hose reaches, and measure from the floor. If it is under 20 inches, that is your fault found, and re-securing the hose to the underside of the counter with a clip or a hose strap is a ten-minute job with no plumbing disconnection involved. Note also that California, Washington, Minnesota and Hawaii require a physical air gap by plumbing code regardless of what the appliance maker permits, so if you are in one of those states a high loop alone is not compliant.

    One more check the manufacturers name and readers skip: GE‘s troubleshooting for a machine that will not drain properly tells you to inspect around the pump inlet screen on the floor of the tub for paper, plastic or other debris blocking the inlet — a fragment of label or the corner of a plastic wrapper is enough. That is a two-minute look with the filters already out, and it is the last thing to rule out before you conclude the pump has failed.

    Bleach, vinegar and dishwasher cleaners: what is actually safe

    This is where readers do real damage, so be specific about what your machine is made of before you pour anything in.

    Never use chlorine bleach in a dishwasher with a stainless steel tub or stainless steel components. Dishwasher tubs are austenitic stainless — the 304/316 family — and chloride ions are the specific thing that family is vulnerable to. The chloride penetrates a local flaw in the passive chromium-oxide layer, and inside the resulting pit it forms hydrochloric acid, so the pit becomes self-propagating: a small anode surrounded by a large undamaged cathode, accelerating as it deepens. That is why the damage is permanent and progressive rather than a stain, and why it is treated as owner-inflicted damage rather than a defect — it is not a warranty repair on any brand. Bosch puts it as a flat prohibition in its owner guidance: do not use chlorine-based cleaners, bleach-based cleaning agents or abrasives on the appliance. Look at your tub walls: if they are metal, no bleach, ever.

    And never mix bleach with ammonia. GE‘s mildew guidance offers a dilute chlorine bleach solution or a dilute ammonia solution as a wipe-down, and states in terms that under no circumstances should the two be mixed, because the combination creates toxic fumes. Note that GE’s page does not sort this by tub material, so it is on you to check what your tub is made of before you take up the bleach option. Use one or the other, never both, never in the same session, and ventilate the kitchen.

    Household acids are not the universally safe alternative either, and the brands disagree about which acid. Bosch advises against descaling its machines with household products such as vinegar or citric acid, on the grounds that they attack the rubber components — the door gasket and internal seals — and directs owners to a descaler it has tested. Miele points elsewhere: in its washing machine documentation it states that correct detergent dosing makes descaling unnecessary, and that where descaling is unavoidable the owner should use a descaling agent with corrosion protection supplied through Miele. Its own descaler is a citric-acid product. So the acid one brand forbids is the acid the other sells you. A cup of vinegar standing in the bottom of a tub through a hot cycle also puts acid in direct, prolonged contact with the door seal, which is the one part of a dishwasher with published evidence of being hard to keep sound. If you need to descale, a descaler approved for your machine is the answer, and it is not an expensive product.

    What is safe on every machine: hot soapy water, a soft brush, a dedicated dishwasher cleaner or descaler that names your brand or states compatibility, and the machine’s own hottest cycle. That combination handles every cause of odour on this page.

    Keeping it from coming back

    • Clean the filter monthly. Once you have done it, it is a two-minute job. Put it on the calendar or attach it to a habit — the first of the month, the day the bins go out, whatever sticks.
    • Scrape, don’t rinse. Scrape plates properly into the bin, but don’t pre-rinse them spotless — modern detergents need some soil to work against, and a rinsed load often cleans worse.
    • Run the machine at least every two or three days. If you genuinely can’t fill it that often, run a short rinse cycle on the part-load.
    • Prop the door open on the latch after each cycle. Twenty minutes of airflow prevents most mildew.
    • Wipe the gasket and the door edge weekly. Thirty seconds with a cloth.
    • Run the disposal before you start the dishwasher.
    • Take the spray arms off and rinse them monthly — that is Panasonic’s stated interval, and it is the one worth adopting whatever you own. Run a descaling cycle with an approved descaler if you’re in a hard water area and the jets are furring.

    Frequently asked questions

    How often should I clean my dishwasher filter?

    Go by your brand rather than by a general rule. Miele’s machines prompt you every 50 programme cycles as a factory default, adjustable between 30 and 60 in the settings menu. Panasonic’s Japanese built-in dishwashers specify emptying the residue filter after every use. Bosch says every few months, more often with heavy use. For a typical household running the machine most days, monthly is a defensible middle, and every two to three weeks if you wash a lot of greasy pans. It takes about two minutes once it is a habit.

    Can I put bleach in my dishwasher to kill the smell?

    Not if the tub is stainless steel. Chloride ions initiate self-propagating pitting corrosion in the 304/316 stainless used for dishwasher tubs, the damage is permanent, and it is not covered by warranty. Bosch prohibits chlorine-based and bleach-based cleaners on its appliances outright. GE offers a dilute bleach wipe-down as one option for mildew — and a dilute ammonia wipe-down as the alternative — with an explicit instruction never to mix the two, because the combination creates toxic fumes. In practice the smell is food, not bacteria on an otherwise clean surface, so removing the food works better than disinfecting around it.

    Does a cup of vinegar on the top rack work?

    It masks rather than fixes. It does nothing to a clogged filter or a plugged spray arm, which is where the smell is coming from. Bosch advises against household acids including vinegar and citric acid, because of what they do to the rubber components; Miele directs owners to a descaler with corrosion protection rather than a household acid, and sells a citric-acid one of its own. Clean the filter first; if the machine is furred with limescale afterwards, use a descaler approved for your machine rather than vinegar.

    Why is there water sitting in the bottom of my dishwasher?

    A small amount of moisture in the sump is normal. A visible pool after a completed cycle means it is not draining. Measure the drain hose loop under the sink first: Whirlpool, KitchenAid, Maytag and JennAir all require the apex to be at least 20 inches (50.8 cm) above the floor, connected above the house drain trap, with an air gap fitting instead if that height cannot be reached. Then check the air gap fitting if you have one, look for debris on the pump inlet screen in the tub floor as GE’s troubleshooting directs, and if the machine or the disposal was recently installed, confirm the disposal’s knockout plug was actually removed. Persistent standing water with all of that ruled out is a failed drain pump, which is a service call.

    My dishwasher smells but the dishes come out clean. What is it?

    Usually the door edge and gasket, or the detergent dispenser. Both sit outside the wash path, so they can be filthy while the wash itself performs perfectly. The gasket is also the part with the most research behind it: a 2016 PLOS ONE study found the rubber seals to be the most frequently fungus-contaminated component in the machines it sampled, at 57% of units tested. Pull the door fully down and look at the strip of tub below the opening — that area is dry during every cycle and never gets rinsed.

    Do I need a dishwasher cleaner tablet, or will detergent do?

    Detergent is formulated to lift food from dishes in the wash path. A dishwasher cleaner is formulated to strip grease film and scale from the tub, the hidden pipework and the pump. For the monthly maintenance cycle, use the cleaner. For the smell itself, neither product substitutes for taking the filter out — the cleaning cycle is the last step of the job, not the whole of it.
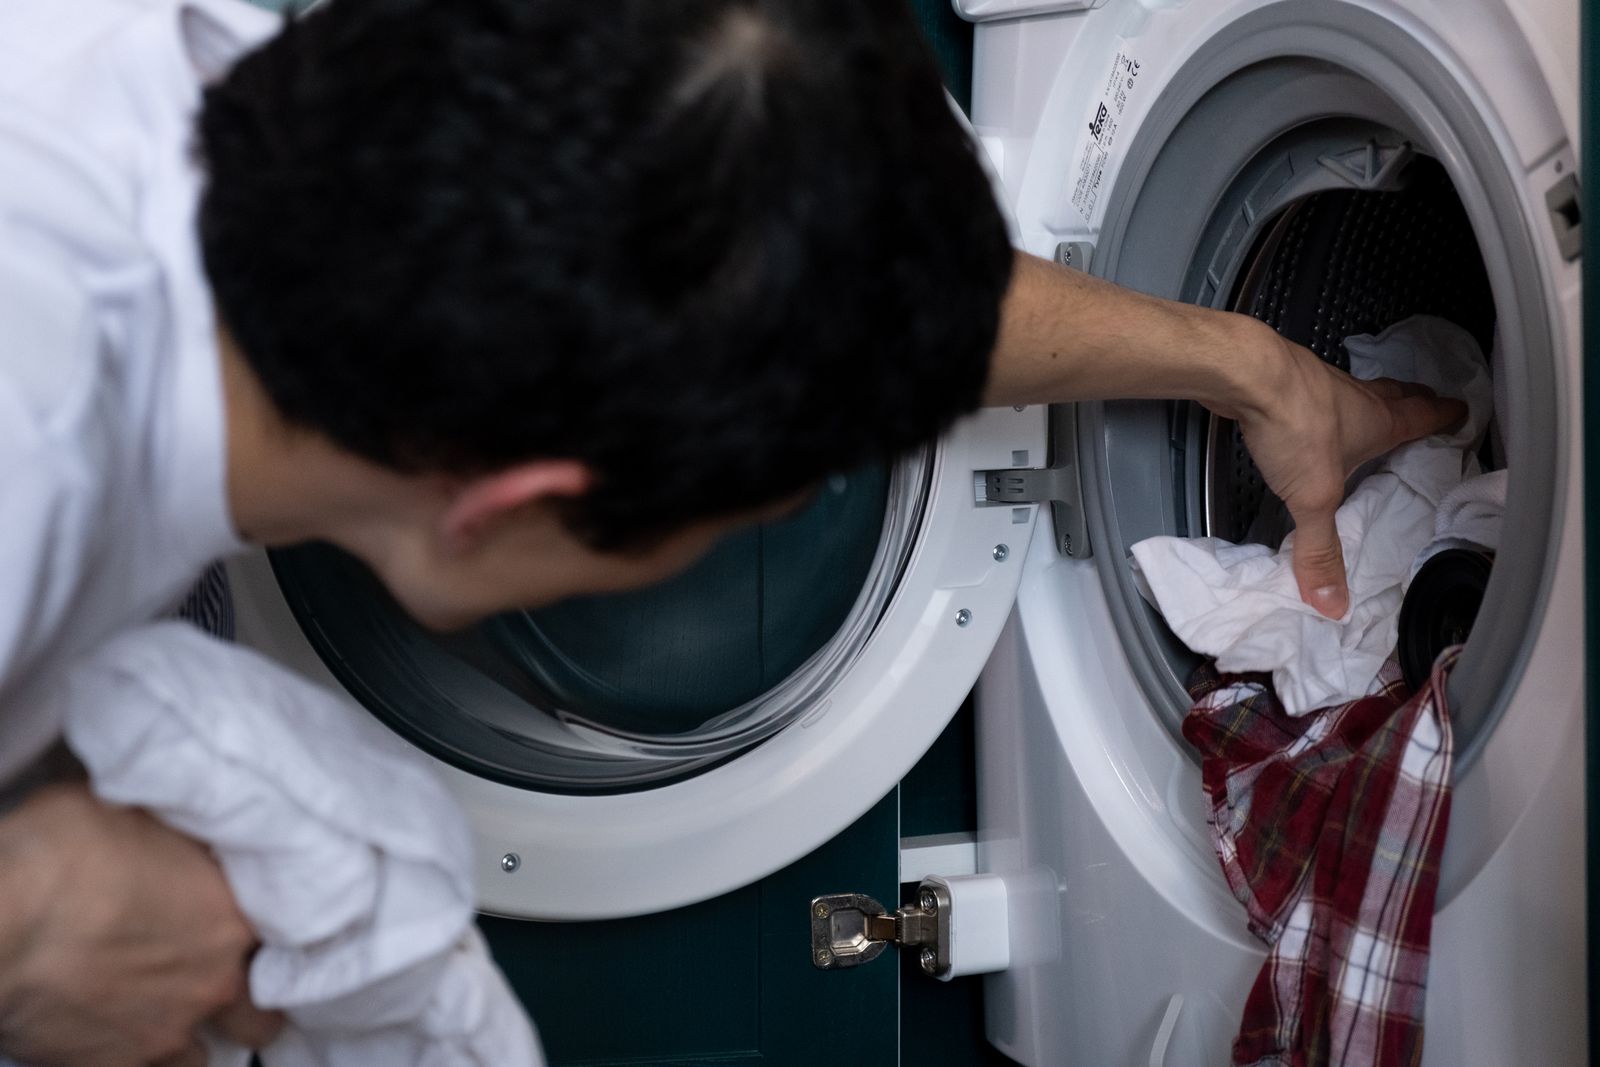
  • How to Clean a Washing Machine (Front Loader vs Top Loader)

    How to Clean a Washing Machine (Front Loader vs Top Loader)

    If your washing machine smells, the drum is almost never the problem. The smell lives in four places you can’t see from the doorway: the folds of the door gasket, the detergent dispenser housing, the drain pump filter, and the gap between the inner drum and the outer tub where residue collects and never fully drains. Running a hot empty cycle scrubs the one surface that was already clean and leaves the other four untouched, which is why the smell comes back within a fortnight.

    Front loaders and top loaders fail in genuinely different ways, so the procedure differs. A front loader traps water in a horizontal rubber bellow that was designed to hold water in — that’s its job — and it will grow a biofilm there whatever detergent you use. A top loader has no bellow to speak of, but it has a deeper outer tub, a dispenser tower, and in agitator models a fabric softener cup that turns into a solid plug. Below is the full sequence for both, with the timings you should actually budget and the specific things that will damage the machine or void the warranty if you get them wrong.

    Why washing machines smell in the first place

    The smell is bacterial biofilm — a soft, greyish, slightly greasy layer that grows on anything permanently damp and fed. What feeds it is undissolved detergent, fabric softener, and body oils from the wash. Three habits create it almost every time:

    • Too much detergent. HE machines use a fraction of the water older machines did. The dose that “looks right” is usually two or three times what the machine can rinse away, and the surplus stays behind as a sticky film.
    • Liquid fabric softener. It works by depositing a waxy cationic coating on fibres. It coats the inside of the machine and the dispenser channels the same way, and that coating is food.
    • Cold washes only. Modern detergents work cold, which is good for your clothes and your bill, but nothing in the machine ever gets hot enough to knock the biofilm back.

    Add a door that gets shut on a damp drum and you have a warm, dark, fed, humid box. That is not a defect. That is a washing machine being used normally.

    Front loader vs top loader: what actually differs

    Know which machine you have before you start, because two of the steps below only exist on one of them.

    Front loader (horizontal axis)

    The critical part is the door gasket, also called the bellow — the thick rubber ring between the door and the drum. It has at least one deep fold running around its lower half, and that fold holds a standing puddle after every wash, along with hair, coins, tissue and grit. This is the number one source of the smell. Front loaders also nearly all have a drain pump filter behind a small hatch at the bottom front of the cabinet.

    Top loader (vertical axis)

    No bellow, so no fold to clean, but the water sits deeper and drains less completely. Two sub-types matter:

    • Agitator models — the tall central post. The fabric softener dispenser cup at the top of the agitator is a classic failure point; softener sets in it like candle wax. On many models that cup lifts off for soaking.
    • HE impeller models — a low disc or plate instead of a post. Less mechanical action, lower water level, and a stronger tendency toward residue on the drum wall and under the plastic rim.

    Most top loaders have no user-serviceable drain filter. Do not go hunting for one and do not remove panels looking for it — if drainage is slow on a top loader that is a service call, not a cleaning job.

    What you need before you start

    • A washing machine cleaner tablet or sachet approved for your machine, or liquid chlorine bleach — one or the other, never both
    • Two or three clean microfibre cloths, plus a couple you don’t mind ruining
    • An old toothbrush or a soft detail brush
    • A shallow tray or baking dish and an old towel (for the drain filter)
    • Washing-up liquid and hot water for the dispenser drawer
    • Gloves

    Cloth choice matters more here than people expect. The gasket fold is a narrow channel and a cotton rag just pushes the sludge deeper into it, where you then can’t reach it; a folded microfibre with some structure to it drags the residue out. If you’re buying, see why professional cleaners buy microfibre by the case — it’s the same reason a decent cloth clears a gasket in one pass and a supermarket rag takes four.

    Never mix these. Chlorine bleach plus vinegar (or any acid — citric acid, descaler, limescale remover) releases chlorine gas. Chlorine bleach plus ammonia (in some glass cleaners and heavy-duty degreasers) releases chloramine gas. Both are dangerous in a laundry room or utility cupboard. This also means you must not run a bleach cycle and then immediately an acid descaling cycle — run a plain rinse cycle in between and ventilate the room.

    How to clean a front loader: the full procedure

    Budget roughly 40–50 minutes of hands-on work, plus one cleaning cycle that will run somewhere between 1 and 2 hours depending on the model. Do it in this order — the cycle goes last, so it flushes away everything you loosened.

    1. Empty the machine and open the door fully (1 minute). Never run a cleaning cycle with laundry inside. Bleach or cleaner at cleaning-cycle concentration will damage fabric.
    2. Pull back the gasket fold and clear the debris (10–15 minutes). With gloved fingers, gently roll the rubber lip back toward you and work all the way around the ring. Expect standing water, hair, grit, sometimes coins and hair grips. Wipe the whole channel with a damp cloth, then go around a second time with the detail brush on the ribbed sections where the film clings. If there are black spots, keep working the area rather than reaching for anything stronger — see the warning below.
    3. Wipe the glass and the door rim (3 minutes). The inner face of the door and the metal or plastic rim it seals against carry the same film. Dry both.
    4. Remove and soak the dispenser drawer (15 minutes, mostly unattended). Most front-loader drawers come out — usually by pulling them fully open and pressing a release tab or the coloured insert in the softener compartment. Soak in hot water with a squeeze of washing-up liquid for ten minutes while you do the next step, then brush out the siphon insert. That little plastic cap in the softener chamber is where the wax plug forms.
    5. Clean the drawer housing (5 minutes). With the drawer out, look up into the empty cavity with a torch. There is almost always a build-up on the roof of the housing where water jets in. Reach in with a cloth wrapped over the brush handle and wipe what you can reach. Refit the drawer.
    6. Clean the drain pump filter (15–20 minutes). Full method in its own section below. Do this before the cleaning cycle, not after.
    7. Run the cleaning cycle (1–2 hours on most Western machines, unattended). Use the Clean Washer, Tub Clean or Drum Clean cycle if your machine has one. Put a washer-cleaner tablet in the empty drum, not in the dispenser drawer — the drawer will not dissolve it properly. Add no detergent and nothing else. If you are using liquid chlorine bleach instead of a tablet, Whirlpool and Maytag specify 1 cup (236 mL) in the bleach compartment, warn that more than that can damage the washer over time, and specifically tell you not to use thickened, easy-pour or no-splash bleach for this — those formulations produce excess suds. Maytag also instructs you to leave the door open afterwards. If your machine has no clean cycle, run the longest, hottest cycle available, empty.
    8. Wipe the gasket dry and leave the door ajar (2 minutes). This last step is the one that decides whether you’re doing this again next month.

    One note on that cycle time, because it trips people up. “One to two hours” is a European and North American expectation. Panasonic’s Japanese drum washers document their sō-senjō (tub clean) course at about 6 hours or about 11 hours depending on the model, because it works by soaking the drum in cleaner at ambient temperature rather than heating it. Panasonic added a heated “approximately 30 °C tub clean” course specifically to bring that down to about 3 hours (about 6 hours on some models) at equivalent effect. If your machine’s clean cycle shows a time that looks absurd, it is almost certainly a soak, and cancelling it halfway wastes the entire run.

    Do not put anything sharp into the gasket. No screwdriver, no scraper, no knife, no wire brush, no bleach-soaked pad left to sit. A puncture or a tear in the bellow means the machine leaks onto the floor, and a torn bellow is treated as damage rather than a defect — it is not a warranty repair on any brand. Equally, mould on a gasket is considered owner maintenance, so a mouldy bellow is generally not covered either.

    What the bellow is made of, and what actually destroys it

    Almost every front-loader door bellow is moulded from EPDM — ethylene propylene diene monomer rubber. The material is chosen because it stays elastic in permanent contact with detergent and fabric-softener solutions at wash temperatures up to 95 °C, which is hotter than any programme in a domestic machine will ever run. That is a demanding specification, and it explains why the part lasts a decade in a wet, hot, soapy environment that would wreck most rubbers.

    Published elastomer compatibility data for EPDM is worth knowing before you pour anything into that fold. EPDM is rated resistant to water and steam, to caustic alkaline solutions, to alcohols, and to dilute acids — including acetic acid at 5%, which is the strength of ordinary household vinegar. What the same charts rate as only limited resistance are two things people are routinely told to use on a blackened gasket: sodium hypochlorite, i.e. liquid chlorine bleach, and oils and petroleum-based solvents, which is what a “rubber conditioner” or a solvent wipe usually is. In other words, the internet’s two favourite gasket treatments — neat bleach left to soak, and an oily dressing to “feed” the rubber — are the two chemistries the material likes least.

    This does not license you to pour vinegar into the machine. The manufacturers’ objections to acid, set out further down, are mostly about the parts that are not EPDM — the heating element, the chrome and copper, the silicone. It does mean that if you are working on the bellow itself, hot water, a mild detergent and mechanical effort with a brush and a structured cloth are the correct answer, and that reaching for something aggressive is a poor trade. The trade literature on these mouldings makes the point bluntly: EPDM has high tear resistance, but a nail, a screw or a hairpin coming through in a pocket will destroy one, and that — not chemistry — is the realistic way a bellow dies.

    On black staining specifically: mould on a bellow colonises the surface of the rubber rather than sitting on top of it, so a thorough clean reliably stops the smell and stops it spreading, and does not reliably restore the colour. A stained but intact bellow is cosmetic. A cracked, perished or punctured one leaks onto your floor.

    How to clean a top loader

    Budget 25–35 minutes hands-on plus the cycle. Fewer steps, but two of them are specific to top loaders.

    1. Empty the drum and check under the rim (5 minutes). Run your fingers around the underside of the plastic ring at the top of the tub. On HE impeller models this is where residue sits, out of the water line and out of sight. Wipe it with a damp microfibre.
    2. Lift out the fabric softener cup, if you have an agitator (10–15 minutes, mostly soaking). On many agitator machines the softener dispenser is a removable cup at the top of the post. Soak it in hot water with washing-up liquid until the waxy plug softens, then brush it clear. If it does not lift off, don’t force it — check the manual for your model number first.
    3. Wipe the lid, the lid seal and the top rim (5 minutes). Condensation collects on the underside of the lid and drips back in.
    4. Run the Tub Clean / Clean Washer cycle (1–2 hours, unattended). Cleaner tablet dropped straight into the empty tub — Whirlpool and Maytag both say put the tablet in the basket, never in the detergent dispenser — or 1 cup (236 mL) of liquid chlorine bleach in the bleach compartment. No detergent, no laundry, nothing else in with it. Maytag’s instruction is to run this cycle every month, and many top loaders carry a Clean Washer indicator light as a periodic reminder. That light is a maintenance prompt, not a fault code.
    5. Dry the rim and prop the lid open (2 minutes).

    If your top loader smells specifically of stagnant water and it drains slowly, stop cleaning and book a service visit. Most top loaders have no filter you can reach, and slow draining points at the pump or the drain hose, neither of which is a cleaning problem.

    The drain pump filter: the part most people have never opened

    On a front loader this is behind a small hatch or a drop-down panel at the bottom front of the cabinet, often sharing a compartment with a short black drain hose. Manufacturers generally advise clearing it every few months. It catches lint, hair, coins, buttons, and the occasional sock, and when it clogs the machine drains slowly, leaves clothes soaked, or throws a drain error.

    1. Unplug the machine. Not optional. You are working at floor level with water.
    2. Lay down an old towel and set a shallow tray against the cabinet. There is more water in there than the tray looks like it can hold — plan to empty it two or three times.
    3. Release the small black drain hose from its clip, pull the plug and let it run into the tray. If the machine has just finished a hot wash, that water will be hot. Let it cool first.
    4. Turn the filter counter-clockwise and withdraw it. Expect more water as it comes free.
    5. Pull the lint out by hand, then rinse the filter under the tap and brush the mesh clear. Check the cavity it came out of too — reach in and feel for anything solid, carefully.
    6. Refit the filter clockwise until it stops. It must go fully home or it will leak. Re-plug the hose, clip it back, close the hatch.

    Budget 15–20 minutes the first time, less afterwards.

    How often, according to the people who built the machine

    “Every few months” is what most English-language cleaning content says. It is roughly what Whirlpool says. It is nothing like what the Japanese manufacturers say, and the gap is wide enough that it is worth knowing which camp your machine came from.

    • Panasonic (drum washers) — the drain filter should be checked and cleaned about once a week. Panasonic’s own maintenance page states the interval as a guideline (目安:週に1回) and tells owners to do it on schedule even when nothing has collected, on the reasoning that a filter you only open when you notice a problem is one you open after drainage has already degraded.
    • Hitachi (drum washers) — the machine raises a lint-filter prompt on the display every 15 cycles, and sooner if the dryer function is used heavily. Two details in Hitachi’s published procedure are worth stealing whatever brand you own: run a one-minute spin-only cycle first so there is less water waiting behind the hatch, and wipe out the recess the filter seats into, not just the filter. Hitachi also tells owners to confirm the filter’s own rubber gasket is intact and to avoid rubbing it, because its lubricant film is part of the seal.
    • LG — monthly. LG’s support documentation names what it expects to find: lost buttons, loose change and lint.
    • Whirlpool — every few months or as needed, depending on how much lint and debris the household generates.

    The honest synthesis is that weekly is the standard for a machine run daily, monthly is the sensible floor for an ordinary household, and “every few months” is the point at which you are gambling on nothing solid having got past the drum. The contents list barely varies between brands: lint, hair, coins, buttons, hair grips, and small items that escape pockets. What varies is how long they have been sitting in standing water before you find them, which is the entire reason a neglected filter smells.

    What you should never put in a washing machine

    Vinegar is not the safe universal answer, and the manufacturers openly disagree with each other about acids. Bosch takes the hardest line: its German-language support material advises against cleaning or descaling a washing machine with either vinegar or citric acid, stating that household acids attack the machine’s rubber parts and cause faster wear, and directs owners to the machine cleaner Bosch has tested in its own washers. Miele answers a different question first. Its washing machine manual states that with correct detergent dosing, descaling the machine is not necessary at all; and that if a machine is nevertheless so heavily limescaled that descaling becomes unavoidable, the owner should use a special descaling agent with corrosion protection, obtained from a Miele dealer or Miele service, following its instructions strictly. Miele’s own descaler is a citric-acid product, so it does not rule out the acid Bosch does — but its emphasis is on dosing rather than descaling. Siemens tells owners to descale every three to six months using a descaler Siemens has tested and approved, rather than a household substitute. One brand forbids both acids, another forbids one and sells the other, and none of them will pay for a perished seal you caused with something their manual told you not to use. Whatever your own manual forbids is the answer for your machine.

    If your manual does permit citric acid, there is a second argument you should know about, because it decides the temperature you run it at. Citric acid dissolves limescale by converting calcium carbonate to calcium citrate — and calcium citrate is itself poorly soluble. German consumer guidance, including advice from Tristan Jorde of Verbraucherzentrale Hamburg reported by ZDF, warns that at raised temperatures the citrate can come out of solution and deposit inside the machine rather than flushing away, and the ceiling commonly quoted in German household advice is around 40 °C. Descaler manufacturers dispute it: HEITMANN, which sells citric-acid descalers, argues on its own FAQ that household concentrations never get high enough for the effect to matter and that hot descaling works faster. The point is not that one side has won. The point is that the disagreement exists, and that the cautious reading costs you nothing — if you descale with citric acid, run it warm rather than hot.

    • More bleach than specified. Whirlpool and Maytag both specify 1 cup (236 mL) of liquid chlorine bleach for a clean-washer cycle and state that using more than that can cause washer damage over time. More is not better.
    • Thickened, easy-pour or no-splash bleach. Maytag names these specifically and tells you not to use them for a clean-washer cycle, because they generate excess suds.
    • Bleach left to soak on the bellow. EPDM is only rated as having limited resistance to sodium hypochlorite. A dosed cleaning cycle is one thing; a bleach-soaked pad parked in the gasket fold for an hour is another.
    • Oily or solvent-based “rubber conditioners” on the gasket. Same reason — EPDM’s weak point is oils and petroleum solvents, not water.
    • Bleach and a washer cleaner in the same cycle. Use one or the other.
    • Detergent during a cleaning cycle. It defeats the point — the cycle is there to rinse detergent residue out, not add more.
    • Abrasive pads or cream cleaner on the drum or bellow. Scratched stainless steel holds residue better than smooth stainless steel, and abrasives will chew the rubber.
    • Anything sharp near the bellow. Worth saying twice.

    Keeping it from coming back

    The cleaning is the easy part; the maintenance is what saves you repeating it.

    • Leave the door and the dispenser drawer ajar between washes. The single highest-value habit for a front loader. If pets or small children make an open door impractical, wipe the gasket dry after the last wash of the day instead.
    • Wipe the gasket fold dry once a week. Thirty seconds with a dry cloth. This alone prevents most of what you just spent an hour removing.
    • Cut your detergent dose. Measure it rather than pouring by eye, and if you use pods, one is one — not one and a half for a full load.
    • Drop the liquid fabric softener, or move to wool dryer balls. This is the fastest fix for a machine that smells again a month after cleaning.
    • Run one hot wash a week — towels or bedding at the highest temperature the fabric allows.
    • Take laundry out promptly. A wet load left overnight re-seeds the drum with everything you removed.
    • Run the cleaning cycle monthly, or whenever the Clean Washer light comes on. Clear the drain pump filter every few months.

    There is published evidence behind the two dullest items on that list

    The open door and the weekly hot wash sound like folklore. They are not. In 2019 a team from the Institute for Hygiene and Public Health at University Hospital Bonn investigated repeated colonisation of newborns in a German neonatal unit after conventional hygiene measures failed. They traced it to a single domestic-type washing machine in the basement, used to launder knitted hats and socks for the ward. The multidrug-resistant Klebsiella oxytoca involved was recovered from two places in that machine: the detergent drawer and the door seal. When the machine was removed, the colonisations stopped. The work was published in Applied and Environmental Microbiology (DOI 10.1128/AEM.01435-19).

    Two things follow for an ordinary household, neither of them alarming. First, the two sites that held the organism are precisely the two sites a hot empty drum cycle never reaches — which is the whole argument for the drawer and gasket steps earlier in this article, and the reason a “clean cycle” on its own keeps failing people. Second, the researchers’ own conclusion was about temperature: domestic machines are increasingly run below 60 °C to save energy, which is fine for ordinary laundry, and they recommended higher wash temperatures where a household includes someone with open wounds, catheters or an infected injury. That is not a reason to stop washing cold. It is a reason for the weekly hot wash on towels and bedding to be a real habit rather than a good intention — and a reason to treat the drawer and the seal, not the drum, as the parts that actually need your attention.

    Frequently asked questions

    How often should I clean my washing machine?

    Run the cleaning cycle monthly — that is Maytag’s own instruction — or when the Clean Washer light appears. Wipe a front-loader gasket dry weekly. For the drain pump filter, go by your brand: Panasonic says weekly on its drum washers, Hitachi prompts every 15 cycles, LG says monthly, Whirlpool says every few months. Monthly is a defensible floor for a typical household, and sooner if you wash pet bedding, sports kit, or anything that sheds heavily.

    The black marks on my door gasket won’t come off. Is it ruined?

    Sometimes, yes. Persistent black staining on the rubber is usually mould that has grown into the surface of the bellow rather than sitting on it, and once it has done that it is a cosmetic stain you can’t scrub out. Cleaning will stop it spreading and stop the smell; it will not always restore the colour. A stained-but-intact bellow is not a safety problem. A torn one is.

    Can I use vinegar to clean my washing machine?

    Check your manual, because the brands genuinely differ. Bosch advises against both vinegar and citric acid, citing damage to rubber parts. Miele says correct detergent dosing makes descaling unnecessary, and that where it is unavoidable you should use a descaler with corrosion protection; its own is citric-acid based. Siemens says use a descaler it has approved, every three to six months. Note also that the bellow rubber itself, EPDM, is rated resistant to acetic acid at household strength — which sits awkwardly beside Bosch’s stated objection that vinegar and citric acid are "sehr aggressiv" toward the machine’s rubber parts. The likeliest reconciliation is that the concern is not the door bellow specifically but everything else an acid reaches once it is circulating: the other seals, the hose connections and the metal components, where dwell time and temperature do the damage. Occasional diluted use is a different proposition from a cup of vinegar every wash, which is where reported seal and hose damage comes from. Never use it in or near a cycle that involves bleach.

    Why does my washing machine still smell after a hot cycle?

    Because a hot cycle only touches the drum. If you have not cleared the gasket fold, the dispenser drawer and housing, and the drain pump filter, the source of the smell is still sitting in the machine, wet, ready to repopulate the drum on the next wash. Do all four locations and the difference is immediate.

    My top loader has no drain filter. Where is it?

    Most top loaders genuinely don’t have a user-accessible one — the pump is designed to pass small debris. Don’t remove cabinet panels looking for it. If the machine drains slowly or leaves clothes soaked, that is a pump or drain hose issue and it needs a technician.

    Does cleaning my washing machine void the warranty?

    Routine cleaning as described in your manual is expected maintenance and does not affect the warranty — skipping it is more likely to cost you a claim. What does cause trouble is damage you inflict: a punctured or torn bellow, a scratched drum, corroded components from overdosing bleach, or acid damage to seals where the manual told you not to use acids. Mould on a gasket is almost universally treated as a maintenance issue rather than a covered defect, which is why the weekly wipe matters.